


How to use Aldax Crystal Cast
Adapted from: www.aldaxstore.com.au
Instructions
During cold weather <23°C, place both bottles in a sealable plastic bag and place in a tub of warm water for 15 minutes, to warm resin. Do not use hot water and never allow any water to come into contact with resin.
The recommended minimum volume to make up at a time is 30mls.
Aldax Crystal Cast Data Sheets:
CLEANING AND SAFETY NOTES:
If a spill of liquid occurs use methylated spirits or acetone as a solvent to clean up. Sand can also be placed on resin as an absorbent material. If resin comes into contact with your skin, use baby wipes and warm soapy water. If resin comes into contact with your eyes, please seek medical assistance.
PRE-MIXING REQUIREMENTS:
Be organised, as you only have approximately 60 minutes work time (pot life) to mix and pour your resin.
- Cover your work space with plastic sheeting or newspapers
- Have good lighting
- Get all materials required, ready for use
- Be environmentally friendly and have a few extra moulds available, into which you can cast excess resin, saving wastage and difficulty in disposal
- Follow mix instructions carefully do not use more or less than recommended
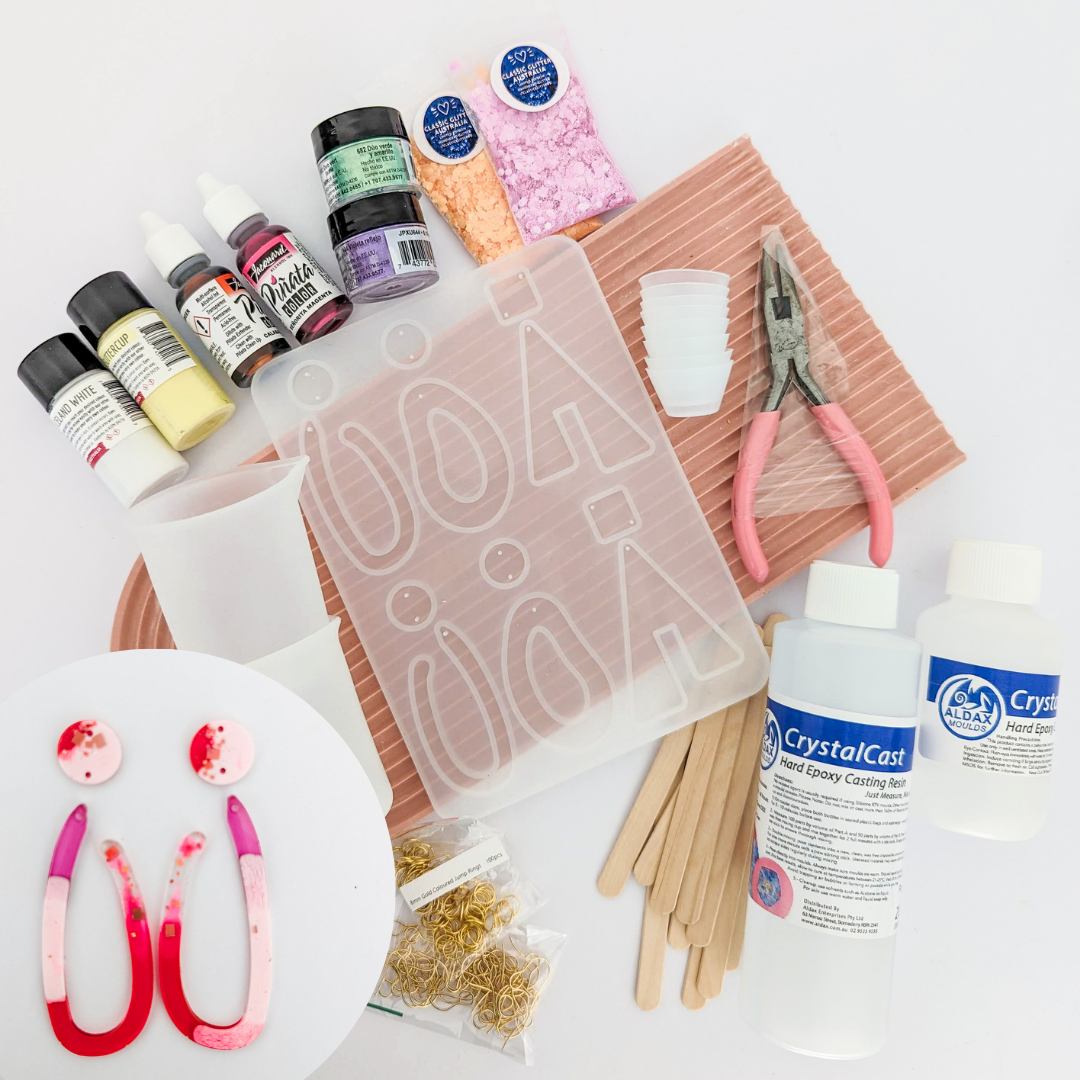
TOOLS REQUIRED
- Use silicone measuring cups, as they can be reused.
- Use mixing sticks
- Use gloves
- Baby wipes
- Resin
- Moulds
- Dyes/Pigments
- Plastic Pipettes
- Toothpicks
- Tub in which resin can be warmed, if necessary
- lsopropyl, acetone or methylated spirits for cleaning
STEP 1
Warm resin, as previously described, in warm water for 15 minutes
STEP 2
Measure by volume using a 2 to 1 ratio
Example 100mls of Part A and 50mls of Part B
STEP 3
Mix Part A and Part B into a clean mixing cup (wax free) until they become completely clear with no streaks or swirls showing, for about 3 to 4 minutes.
Do not put colour pigments into Part A as colour interferes with your ability to determine proper mixing. Add colour to the mixture (A+ B).
STEP 4
Then pour this mixture into a clean cup and mix for another minute, scraping sides and bottom of cup regularly during all mixing stages.
STEP 5
If adding various colours, divide clear mixture into cups, add colour into individual cups and mix for 1 minute.
Let the resin rest for 5 minutes to degas.
When adding a colour, normally only a few drops are required. Less than 5% to total volume of resin. Some dyes are very concentrated.
STEP 6
Pour directly into your mould or surface from a distance of 5cm. Multi pours of 30mm in depth is recommended. Leave several hours between pours.
- Some moulds can be warmed which can enhance the performance of resin in the winter.
- Plastic moulds will require a mould release. If you experience difficulties in the releasing of resin from the mould, put the mould in a freezer for a few minutes, this often helps. Silicone moulds do not require a releasing agent.
STEP 7
Allow resin to cure at room temperature. Cover the mould, so dust and insects cannot land onto the finished piece. Cure time is dependent on temperature, volume and amount/ type of colour added. Approximate cure time ranges from 24hrs to 48hrs. Some smaller pieces may take 48-72 hours until they are fully cured.
Bubbles can be burst with a toothpick or a slight mist of isopropyl. Gentle flaming with a butane gun is also used. With proper mixing bubbles should not be a big issue.
If adding porous objects into resin such as paper, make sure that they are sealed. If they are not sealed they can release air bubbles.
Crystal cast can be drilled with a Dremel or very small drill bit, for adding findings.